Homemade Valentines are always the best. Who doesn’t love a Valentine’s treat that was made by hand and delivered by someone near and dear to you? In honor of Valentine’s Day, we’ve put together a little do-it-yourself tutorial. A Valentine you can share with the girls in your life and maybe just one more for you. Check out these DIY projects and follow step by step…
Clay Heart Earrings
These post earrings are easy to make, require only 3 materials, and are very cute. You could make shapes other than hearts, too. These earrings were originally inspired by traditional conversation hearts, but I made them a little more modern so they could be worn all year long instead of just in February. You could also make bobby pins, hair clips, dangly earrings by simply modifying the instructions below.
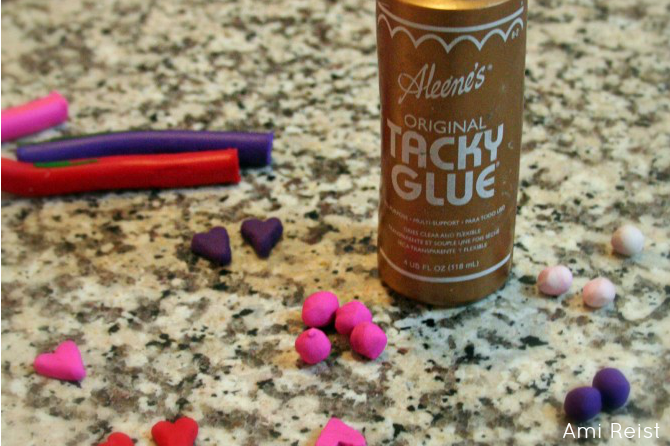
Materials needed: Modeling Clay, earring posts, tacky glue, and toothpicks (optional)
.JPG)
1.) Open the modeling clay and select a few colors. This clay was purchased at Wal-Mart for only $2.97. It dries overnight, comes in 20 colors, and can be used for many other crafts, too.
.JPG)
2.) Choose a few Valentines colors – red, pink, purple, white. Note: Wash hands before handling white clay. If you have touched other colored clay, those colors will transfer to the white.

3.) Use a knife to slice the clay strips into ¼ inch slices.
.JPG)
4.) Form little round balls with the clay slices.

5.) Carefully shape the clay balls into little hearts. A toothpick might be helpful while doing so. Keep in mind that you want the entire heart shape to be large enough to cover the earring post on the back; this should determine the size of the heart.

6.) Let the heart dry overnight. Then, take some clear-drying tacky glue and place one drop on the backside of either heart. Tacky glue can be purchased at any craft store for roughly $1. If you do not have tacky glue, hot glue, super glue, or an epoxy resin can be used.

7.) Take the post earrings and place them in the dollop of glue. Press down so the glue is in complete contact with the metal earring back. Let the glue dry completely. These earrings posts were purchased at Michael’s Craft Store for $2.99/12 posts and earring backs.
.JPG)
.JPG)
8.) Ta-da! Valentine’s Day earrings that can be shared with girlfriends, daughters, mothers, and Valentines.
Valentine’s Day Heart Nails
Want to feel extra spirited, extra girlie and extra glam this Valentine’s Day? Spice up your nails with this simple tutorial. You don’t have to be completely ambidextrous to complete this nail design – you could just put in on whichever finger nail you feel most comfortable painting. You could even paint a heart on all of your nails. If you’re feeling extremely giving – paint someone else’s nails for them! You’ll only need a few shades of nail polish, some glitter polish, and a few toothpicks.

1.) Paint your nails as normal. For fun, paint the ring fingers of either hand a bright, cheery color to make them really stand out. We chose a neutral tan color with a pop of bright pink. Let dry.

2.) Pour a tiny amount (3 drops will do) of a different colored nail polish onto a paper surface – paper plates or a few pieces of newspaper seem to work well. We chose red nail polish.
3.) Using a toothpick as a paintbrush, create a small heart on your ring finger. Let dry.
4.) Pour a different color on a piece of paper and dip the toothpick in the polish. We used white nail polish. Very carefully, paint an outline around the heart painted previously. If you bump the polish, use the toothpick to go back and make corrections. Let dry.
5.) Add some sparkle. We used pink glitter polish to add some glitz to the heart. One small swipe over the heart shape will make it glisten. Let dry.
6.) Voila! A pretty set of nails perfectly styled for Valentine’s Day!
Stay tuned for a few more Valentine’s Day inspired DIY projects next week on Shorebread!


